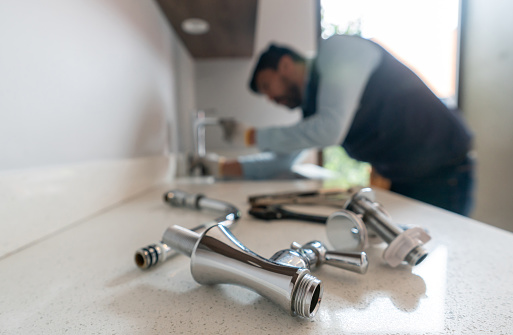
Can You Paint a Kitchen Sink? : Ultimate Guide Like a Pro

Can You Paint a Kitchen Sink?” It’s a question that might surprise you, but it’s worth considering. After all, your kitchen sink plays a pretty important role in your daily life. And while you might spend a lot of time thinking about cabinets and countertops, the sink often gets overlooked. But don’t underestimate its potential! In this blog, we’ll explore a fun and budget-friendly way to give your kitchen sink a fresh new look—painting it! So, let’s roll up our sleeves and discover how to add a splash of style to your kitchen.

A painting brush which is use for painting kitchen sink

Preparing Your Sink for Painting

Your kitchen sink, the unsung hero of meal prep, might have a few battle scars. But before we embark on the exciting journey of sink painting, let’s give it a checkup.

Start by studying your sink – is it stainless steel, porcelain, or another material? Knowing this is like understanding your canvas before painting. Look out for sneaky rust or imperfections that could disrupt your painting plans.

Now, let’s get practical. To turn your sink into the perfect canvas, gather your tools – cleaning agents, sandpaper, filler for cracks, and, of course, top-notch primer and paint designed for kitchen sinks. It’s like preparing your paintbrushes before a masterpiece.

With your supplies ready, roll up your sleeves. Treat your sink to a spa day – clean away dirt and grease to reveal its true beauty. Then, use sandpaper to smooth out the surface, paying attention to scratches. Fill in any cracks, ensuring your sink is smooth as butter before the painting fun begins.

Now, armed with a clean canvas, you’re set to transform your kitchen sink. Put on your DIY hat, and let’s jump into the vibrant world of sink painting!

Step-by-Step Painting Guide

Alright, DIY enthusiast, you’ve prepared your sink, and it’s looking like a blank canvas waiting for a touch of magic. Let’s break down the painting process into easy steps to turn that ordinary sink into a customised masterpiece.

Think of this step as the foundation for your artwork. Start by giving your sink a thorough cleaning aEco-Friendly Upcycling:

nd degreasing session. Imagine it’s a spa day for your sink—scrub away the dirt and grime to reveal its true beauty. Now, grab some sandpaper and smooth out the surface, paying extra attention to any scratches or rough spots. The goal? A smooth canvas ready to soak in the paint.

But wait, what about those tiny cracks or imperfections? Don’t worry; we’ve got you covered. Fill them in with an appropriate filler, ensuring your sink is flawless and ready for its colourful makeover. It’s like patching up a canvas before starting a painting—ensuring perfection from the get-go.

Now that your sink is clean and smooth, it’s time for the primer, the unsung hero of any painting project. Apply a quality primer to create an even base. Think of it as the primer you’d put on a wall before painting; it ensures the paint adheres well and your colours pop. Follow recommended techniques for an even application, and you’ll be one step closer to a vibrant and long-lasting finish.

Ah, the fun part—choosing the paint colour! Pick a shade that complements your kitchen decor and speaks to your style. Once you’ve got your colour, it’s time to apply multiple coats. Think of it as layering colours on a canvas; each coat brings you closer to the final masterpiece. Make sure each layer is fully dry before adding the next—patience pays off in the world of DIY sink painting.

You’ve painted your sink, and it’s looking fantastic. Now, let’s seal the deal—literally. Use a durable sealant to protect your painted surface from daily wear and tear. It’s like adding a varnish to a painting, ensuring your masterpiece stays vibrant and intact over time. Follow recommended maintenance tips, and your painted sink will be a long-lasting work of art in your kitchen.

Now that you’ve mastered the steps, your kitchen sink is no longer just a sink—it’s a personalised masterpiece. In the next section, we’ll wrap it up and explore the benefits of this creative endeavour.

Benefits of Painting Your Kitchen Sink

Congratulations! You’ve successfully transformed your kitchen sink into a personalised canvas. Now, let’s delve into the myriad of benefits that come with this creative endeavour.

One of the most significant advantages of painting your kitchen sink is the cost-effectiveness. Instead of splurging on a new sink, which can be quite pricey, a fresh coat of paint breathes new life into your existing fixture. This budget-friendly alternative allows you to allocate your resources to other areas of your home while achieving a stunning kitchen makeover.

Your kitchen should reflect your unique style, and a painted sink offers a fantastic opportunity for personalization. Choose a colour that complements your decor or makes a bold statement. It’s a chance to infuse your personality into a utilitarian element, transforming it into a design focal point that ties the entire kitchen together.

 In an era where sustainability matters, painting your kitchen sink is an eco-friendly choice. Instead of discarding a functional sink, you’re giving it a second life. This upcycling approach reduces waste and contributes to a more environmentally conscious home improvement project.

Not everyone has the time or resources for a full-scale kitchen renovation. Painting your sink offers a quick and accessible way to inject creativity into your space without the hassles of extensive remodelling. It’s a DIY project that yields impressive results, allowing you to enjoy the satisfaction of a revamped kitchen with minimal disruption to your daily life.

If you’re a homeowner who loves to switch things up, a painted sink provides a temporary makeover option. Unlike permanent changes, such as replacing countertops or cabinets, repainting is a reversible process. If you decide to change your kitchen’s colour scheme in the future, you can easily repaint the sink to match the new look.

In conclusion, painting your kitchen sink isn’t just a cosmetic upgrade; it’s a practical and eco-friendly way to enhance your kitchen’s aesthetics. The benefits extend beyond the visual appeal, encompassing cost savings, personalization, and the satisfaction of a DIY project that leaves a lasting impression. Embrace the transformation and enjoy the renewed charm of your kitchen space.

Conclusion

In wrapping up our sink painting adventure, you’ve not only saved money but also added your unique style to the heart of your home. By choosing to paint, you’ve given your sink a second life and contributed to a greener home.

This creative journey wasn’t a massive renovation headache, but a quick and satisfying way to refresh your kitchen. Now, your sink is more than just functional; it’s a reflection of your taste and personality.

Think of it as a temporary makeover option. If you ever fancy a change, repainting is a breeze. So, as you admire your revamped kitchen, remember the power of a little paint and a lot of creativity. Your kitchen sink is now a canvas, and your home has a newfound charm. Here’s to more DIY adventures and a home that feels uniquely yours!

FAQ’s:

When painting a kitchen sink, go for epoxy-based paint made for surfaces that deal with water. It lasts long, resists stains, and holds up well against regular use and cleaning.

Yess, it’s safe to paint your kitchen sink. Just make sure to use paint that’s safe for surfaces in contact with water and follow the guidelines for a worry-free experience.

Yess, You can paint stainless steel. Just clean it well, use a metal primer, and choose good-quality paint made for metal surfaces to make it last.

Don’t wash latex paint in the sink. Dispose of extra paint correctly, and clean your brushes or tools in a utility sink instead.

If you paint stainless steel with the right rust-resistant paint, it’s less likely to rust. Just make sure to prep the surface well and use good-quality paint for metal.

Similar Posts

Leave a Reply

Your email address will not be published. Required fields are marked *

One Comment

  1. Superb ideas and information, are really helpful and I will apply the instructions exactly as I read in the blog. Thanks so much❤